One Sunday in September, Chad and I streamed the season opener to Oregon Field Guide: Unprepared: An Oregon Field Guide Special. The topic was emergency preparedness, or the lack thereof, in Oregon – so we thought we should pay attention.
It was an eye opening episode and I picked up these points while I watched (I recommend watching, these were just the points that resonated with me):
- A major earthquake of the Pacific Northwest (and broader area) is geologically 100 years overdue.
- Almost all Oregon bridges are at risk in a major earthquake.
- Repairs to local water and electrical could take from a few weeks up to a year.
- Restoration of emergency services (police and fire) could take from a few weeks up to a year.
Those four zingers of information were catalyzing for us to give our food and water storage more thought. In addition to the project outlined below, I’ve also checked the following off my list:
- Placed my 72 hour kit in the car – if Zoe and I are elsewhere when emergency strikes, we’ll have food, water, and shelter in the car.
- Purchased a SteriPen UV water purifier – in case of long term water outage.
- Purchased some iodine tablets for water purification – because it’s better to have more than one backup!
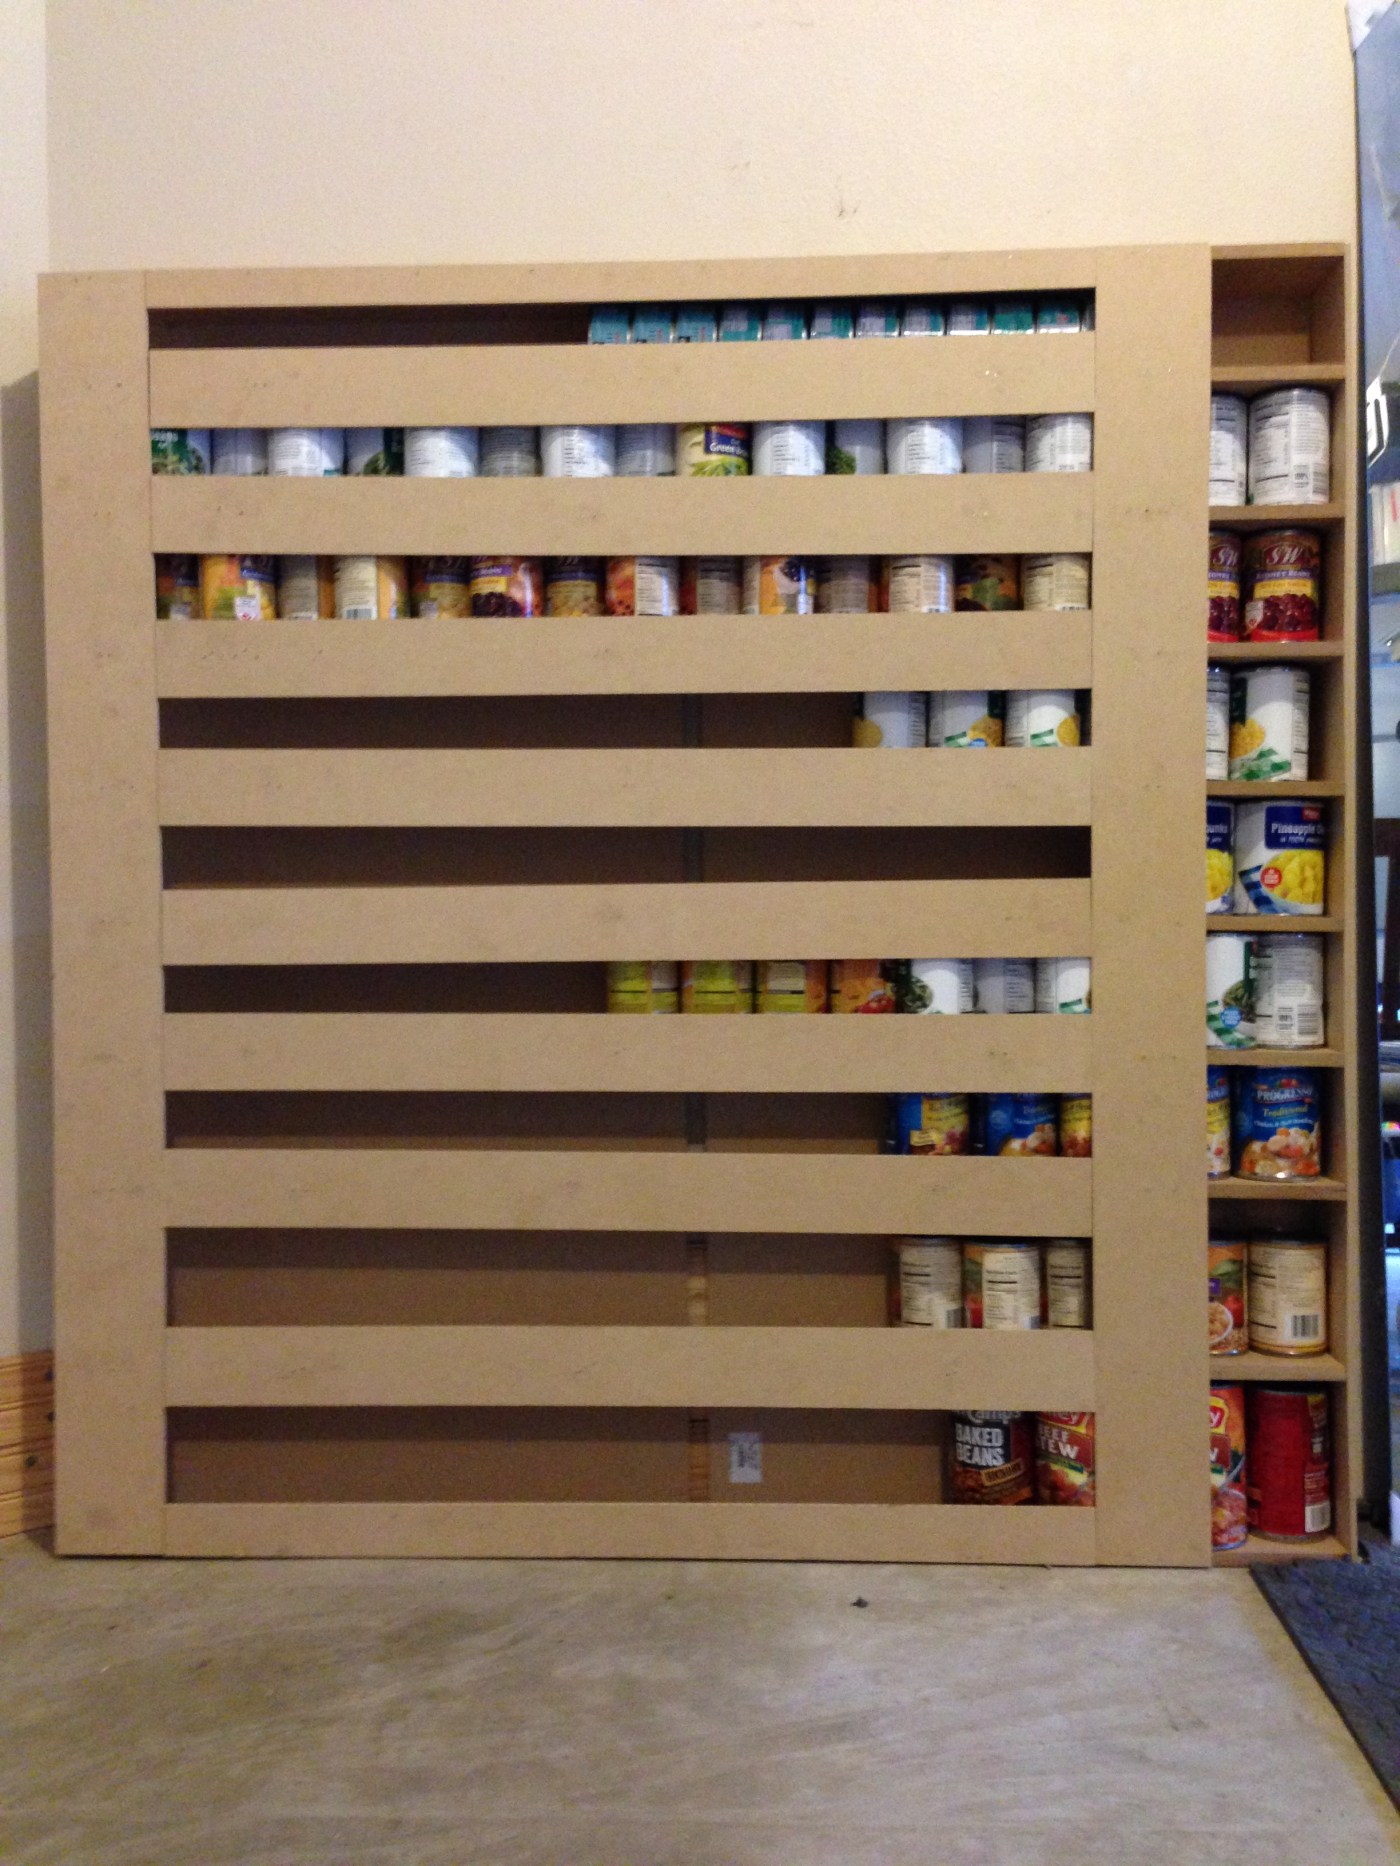
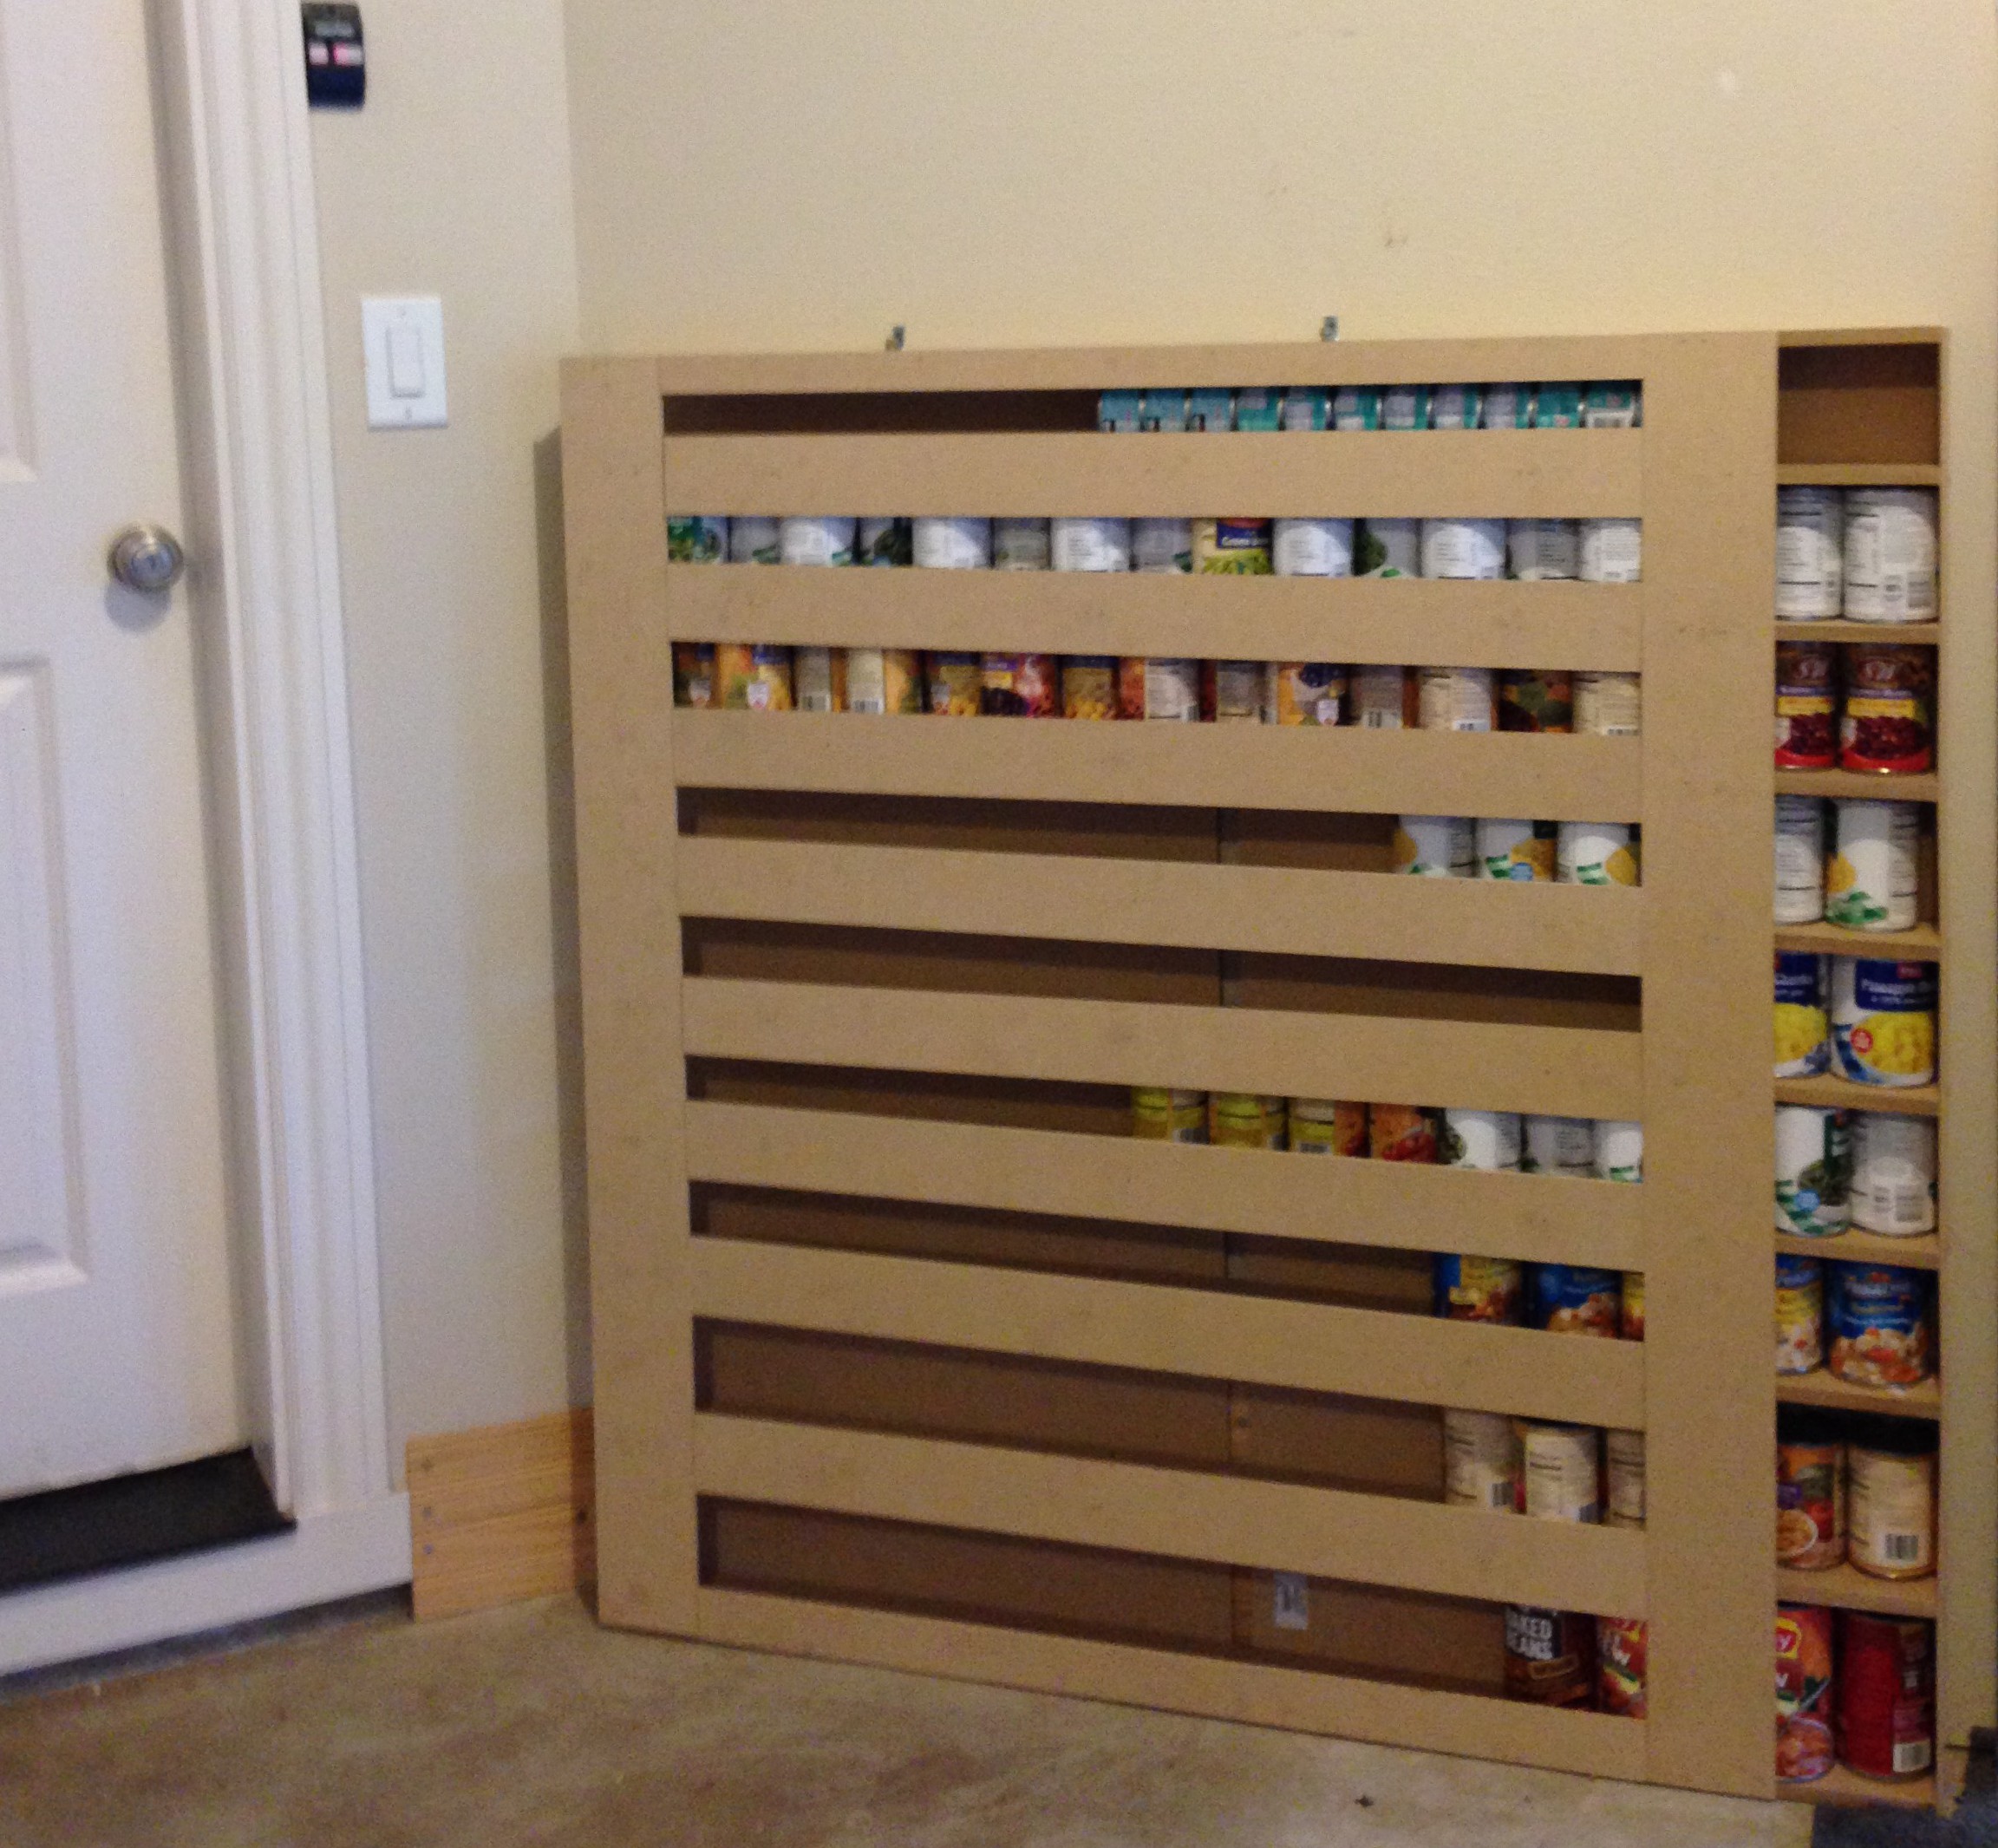
And in my biggest accomplishment this week (and yes, it’s only Tuesday!) I’ve built this cool canned food storage shelf that allows me to rotate stock! I found it on Pinterest, but the source is ProvidentLiving.org – in New Zealand!
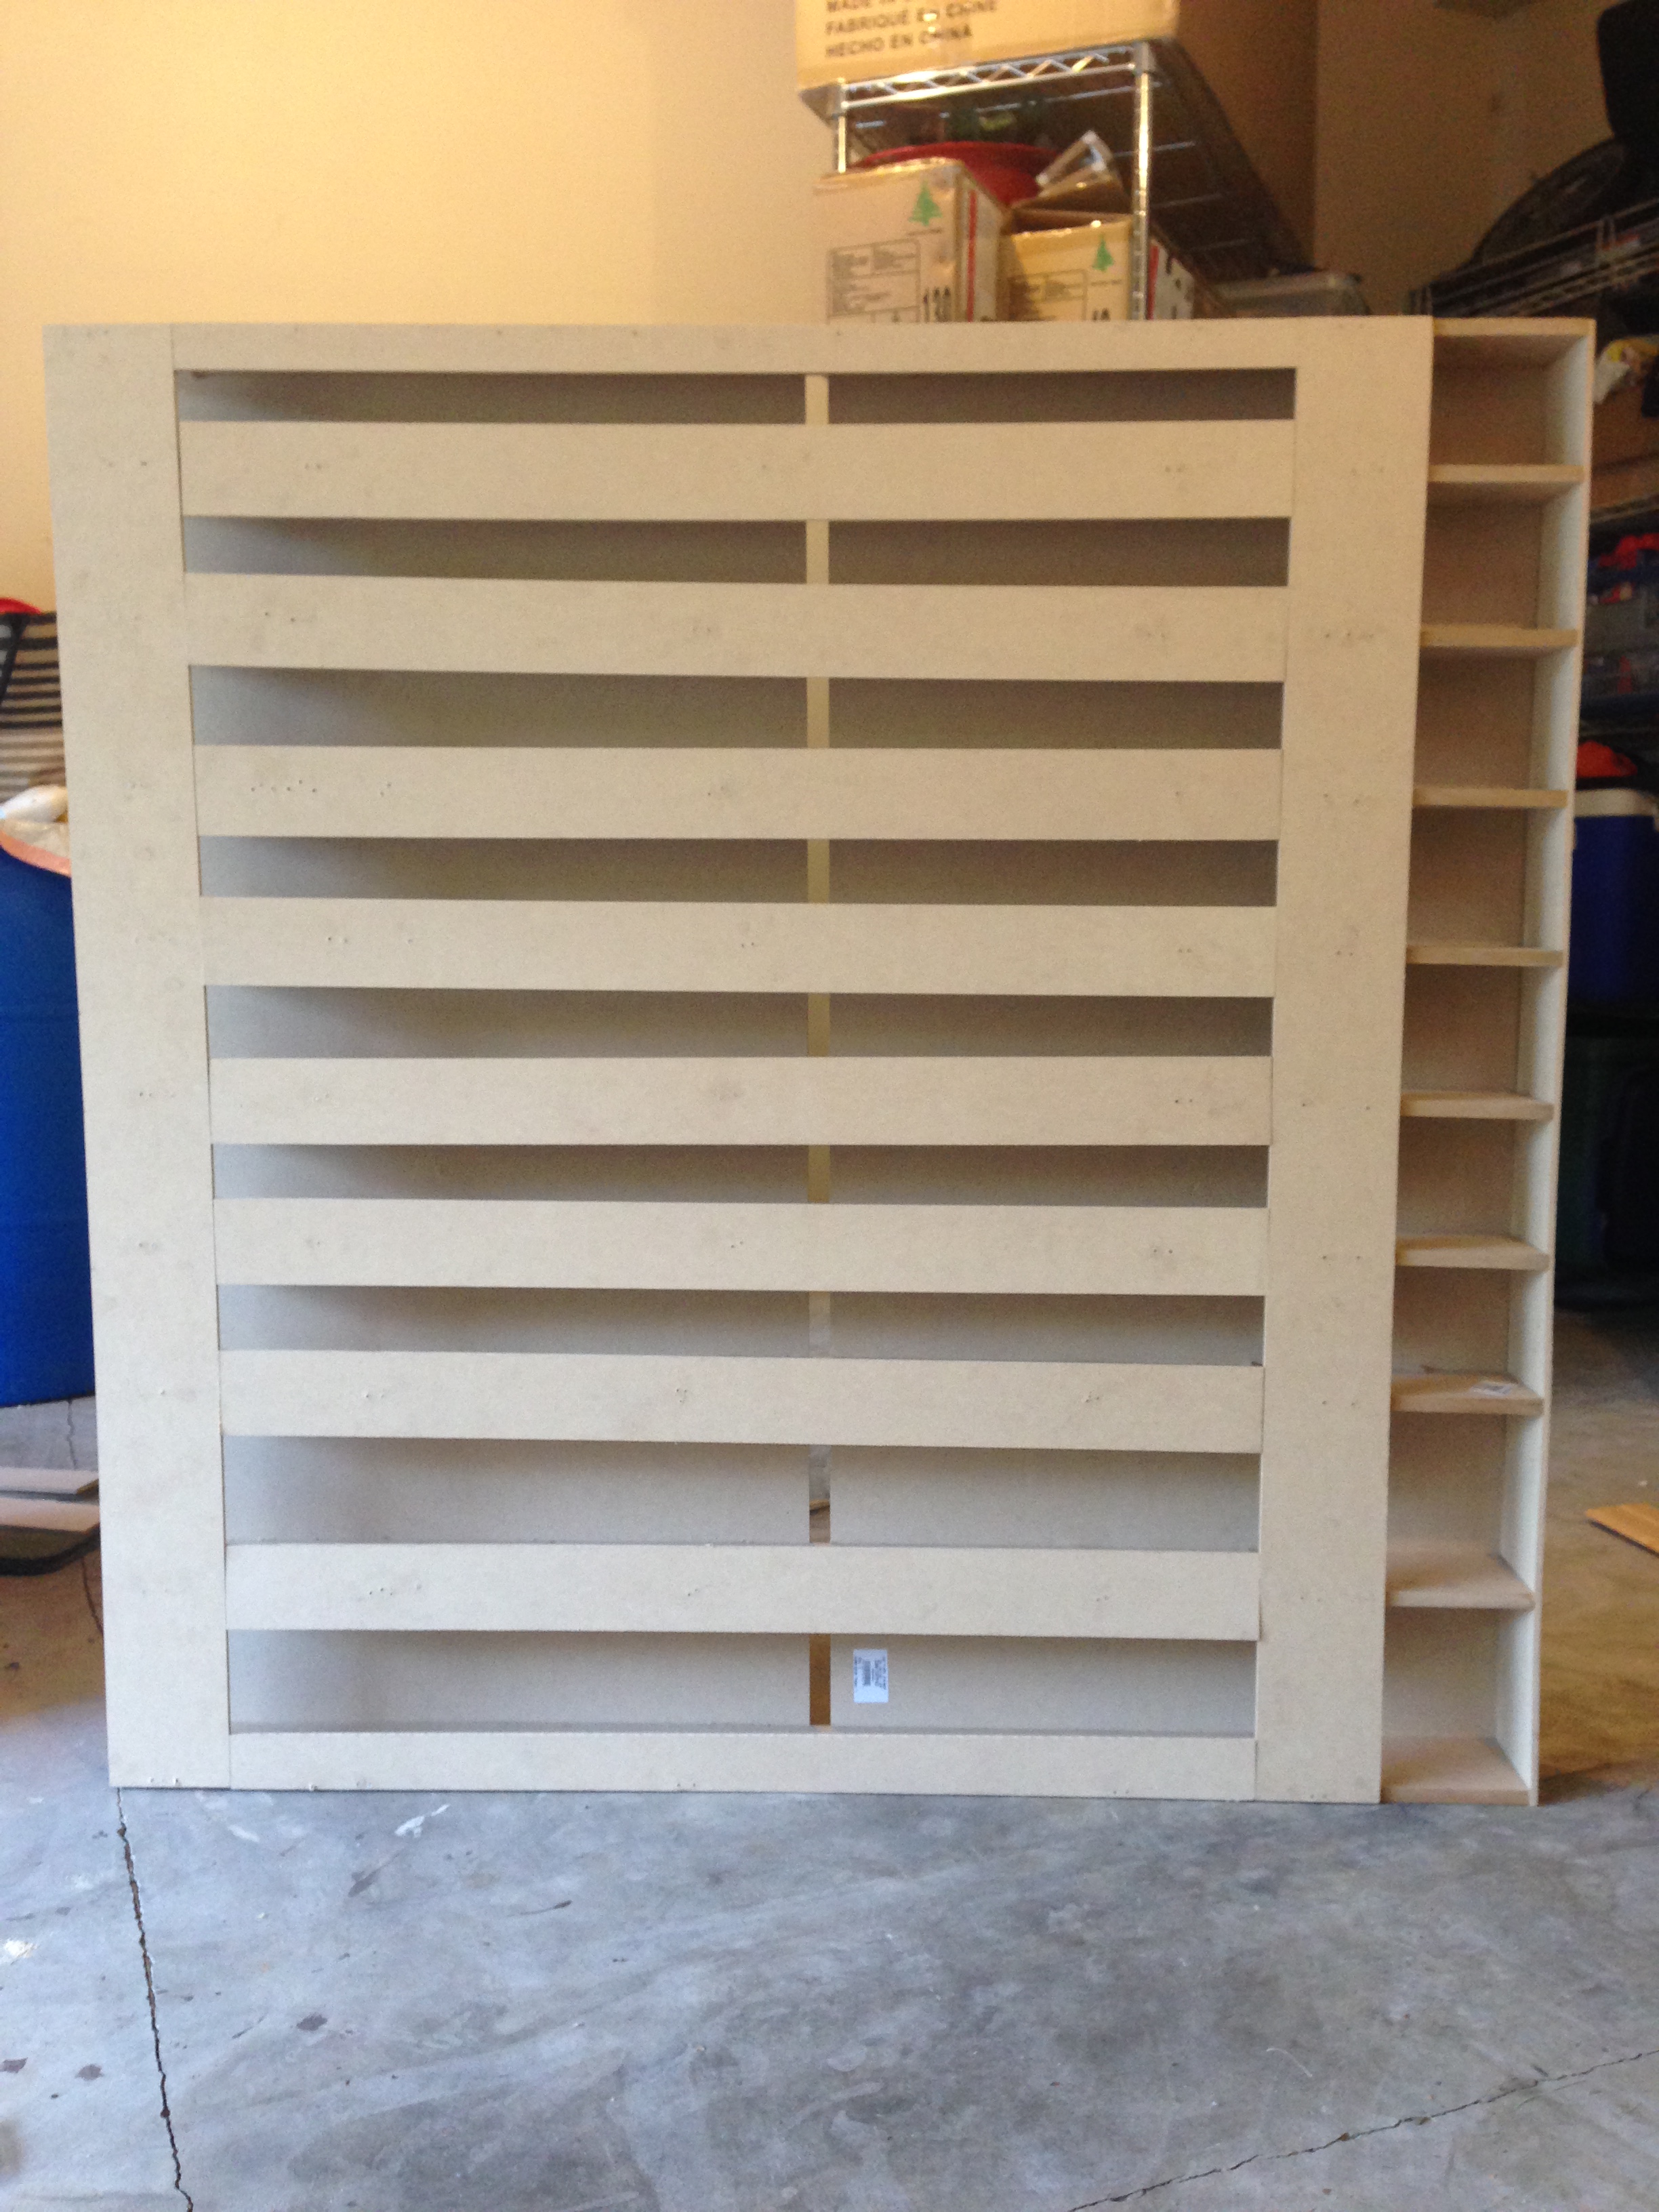
The idea is to load your cans on the left, and as you add more ‘new’ cans, the older cans can be removed on the right. It’s also less than 5 inches deep, so it was a good fit for the garage wall.
The plans from ProvidentLiving just showed pictures (like mine above, only prettier!) and suggested adding 10mm of clearance to your can depth and height to ensure they’d fit in the shelves well. But it’s a simple (yet brilliant!) design. I’ll talk you through how I did it – but read the lessons learned before you repeat my mistakes!
Supplies: ($55)
- (2) 1/2” x 2′ x 4′ MDF Boards cut into 10 shelves of 4.25” x 4 feet
- (2) 1/4” x 2′ x 4′ MDF Boards cut into the following lengths:
- (2) 4” x 4 feet lengths – these are the front braces on the shelf
- (1) 4.25” x 4 feet length – this is the one closed side of the shelf
- (10) 3” x 4 feet lengths – these will be nailed to the front of the shelf to hold the cans in – they will be trimmed to fit in one of the last steps of building the shelf.
- (2) 1/4″ x 2′ x 4′ MDF Boards – uncut – these are the backs of the bookshelf
- (100) 4mm 1” wood screws
- Box dressing nails
Instructions:
- Get a table saw, the guy at the cutting counter of my local big box hardware store ripped all of the wood for me, but then informed me I shouldn’t (ever) come back expecting to have this many cuts made. So go ahead and get cutting, or bring the poor guy an incentive.
- Once all lumber is cut: Brace the bottom shelf under one of the 1/4” 2′ x 4′ boards, place a few loose shelves under the shelf back to prop it up, prevent cracking, and provide a level surface to drill from.
- Line up the bottom shelf with the short end of your 2′ x 4′ board, ensure the end of the shelf is also flush with the corner of the board – this part is only important if you want a square shelf.
- Drill a few screws through the shelf back into the bottom shelf. Avoid the edge of the shelf back, as the MDF is prone to split. I inset the first screw by 3” and drilled a new one ever 6”.
- Drag down the next shelf and, using the largest size can you plan to store as a guide, place the second shelf in the desired location.
- Check that the shelf has enough clearance by placing a can on each end of the board as a spacing template – and remember to include a small gap.
- Use a flat edge to draw a pencil line on the 2′ x 4′ shelf back, where the center of the shelf should be- this will show you where to drill.
- Ensure your shelf edge is flush with the edge of the shelf back. Again, this is only important if you want a square, even shelf.
- Drill 3-4 screws through the shelf back into the bottom shelf.
- Test the shelf by rolling a can underneath the inverted shelf to ensure there is enough clearance. If needed, unscrew and reset the second shelf with more clearance.
- Repeat steps 5-9 until all shelves are attached to the first shelf back.
- Then add the second 2′ x 4′ Shelf Backing board and repeat steps 5.1-9 until all shelves are attached to the second shelf back.
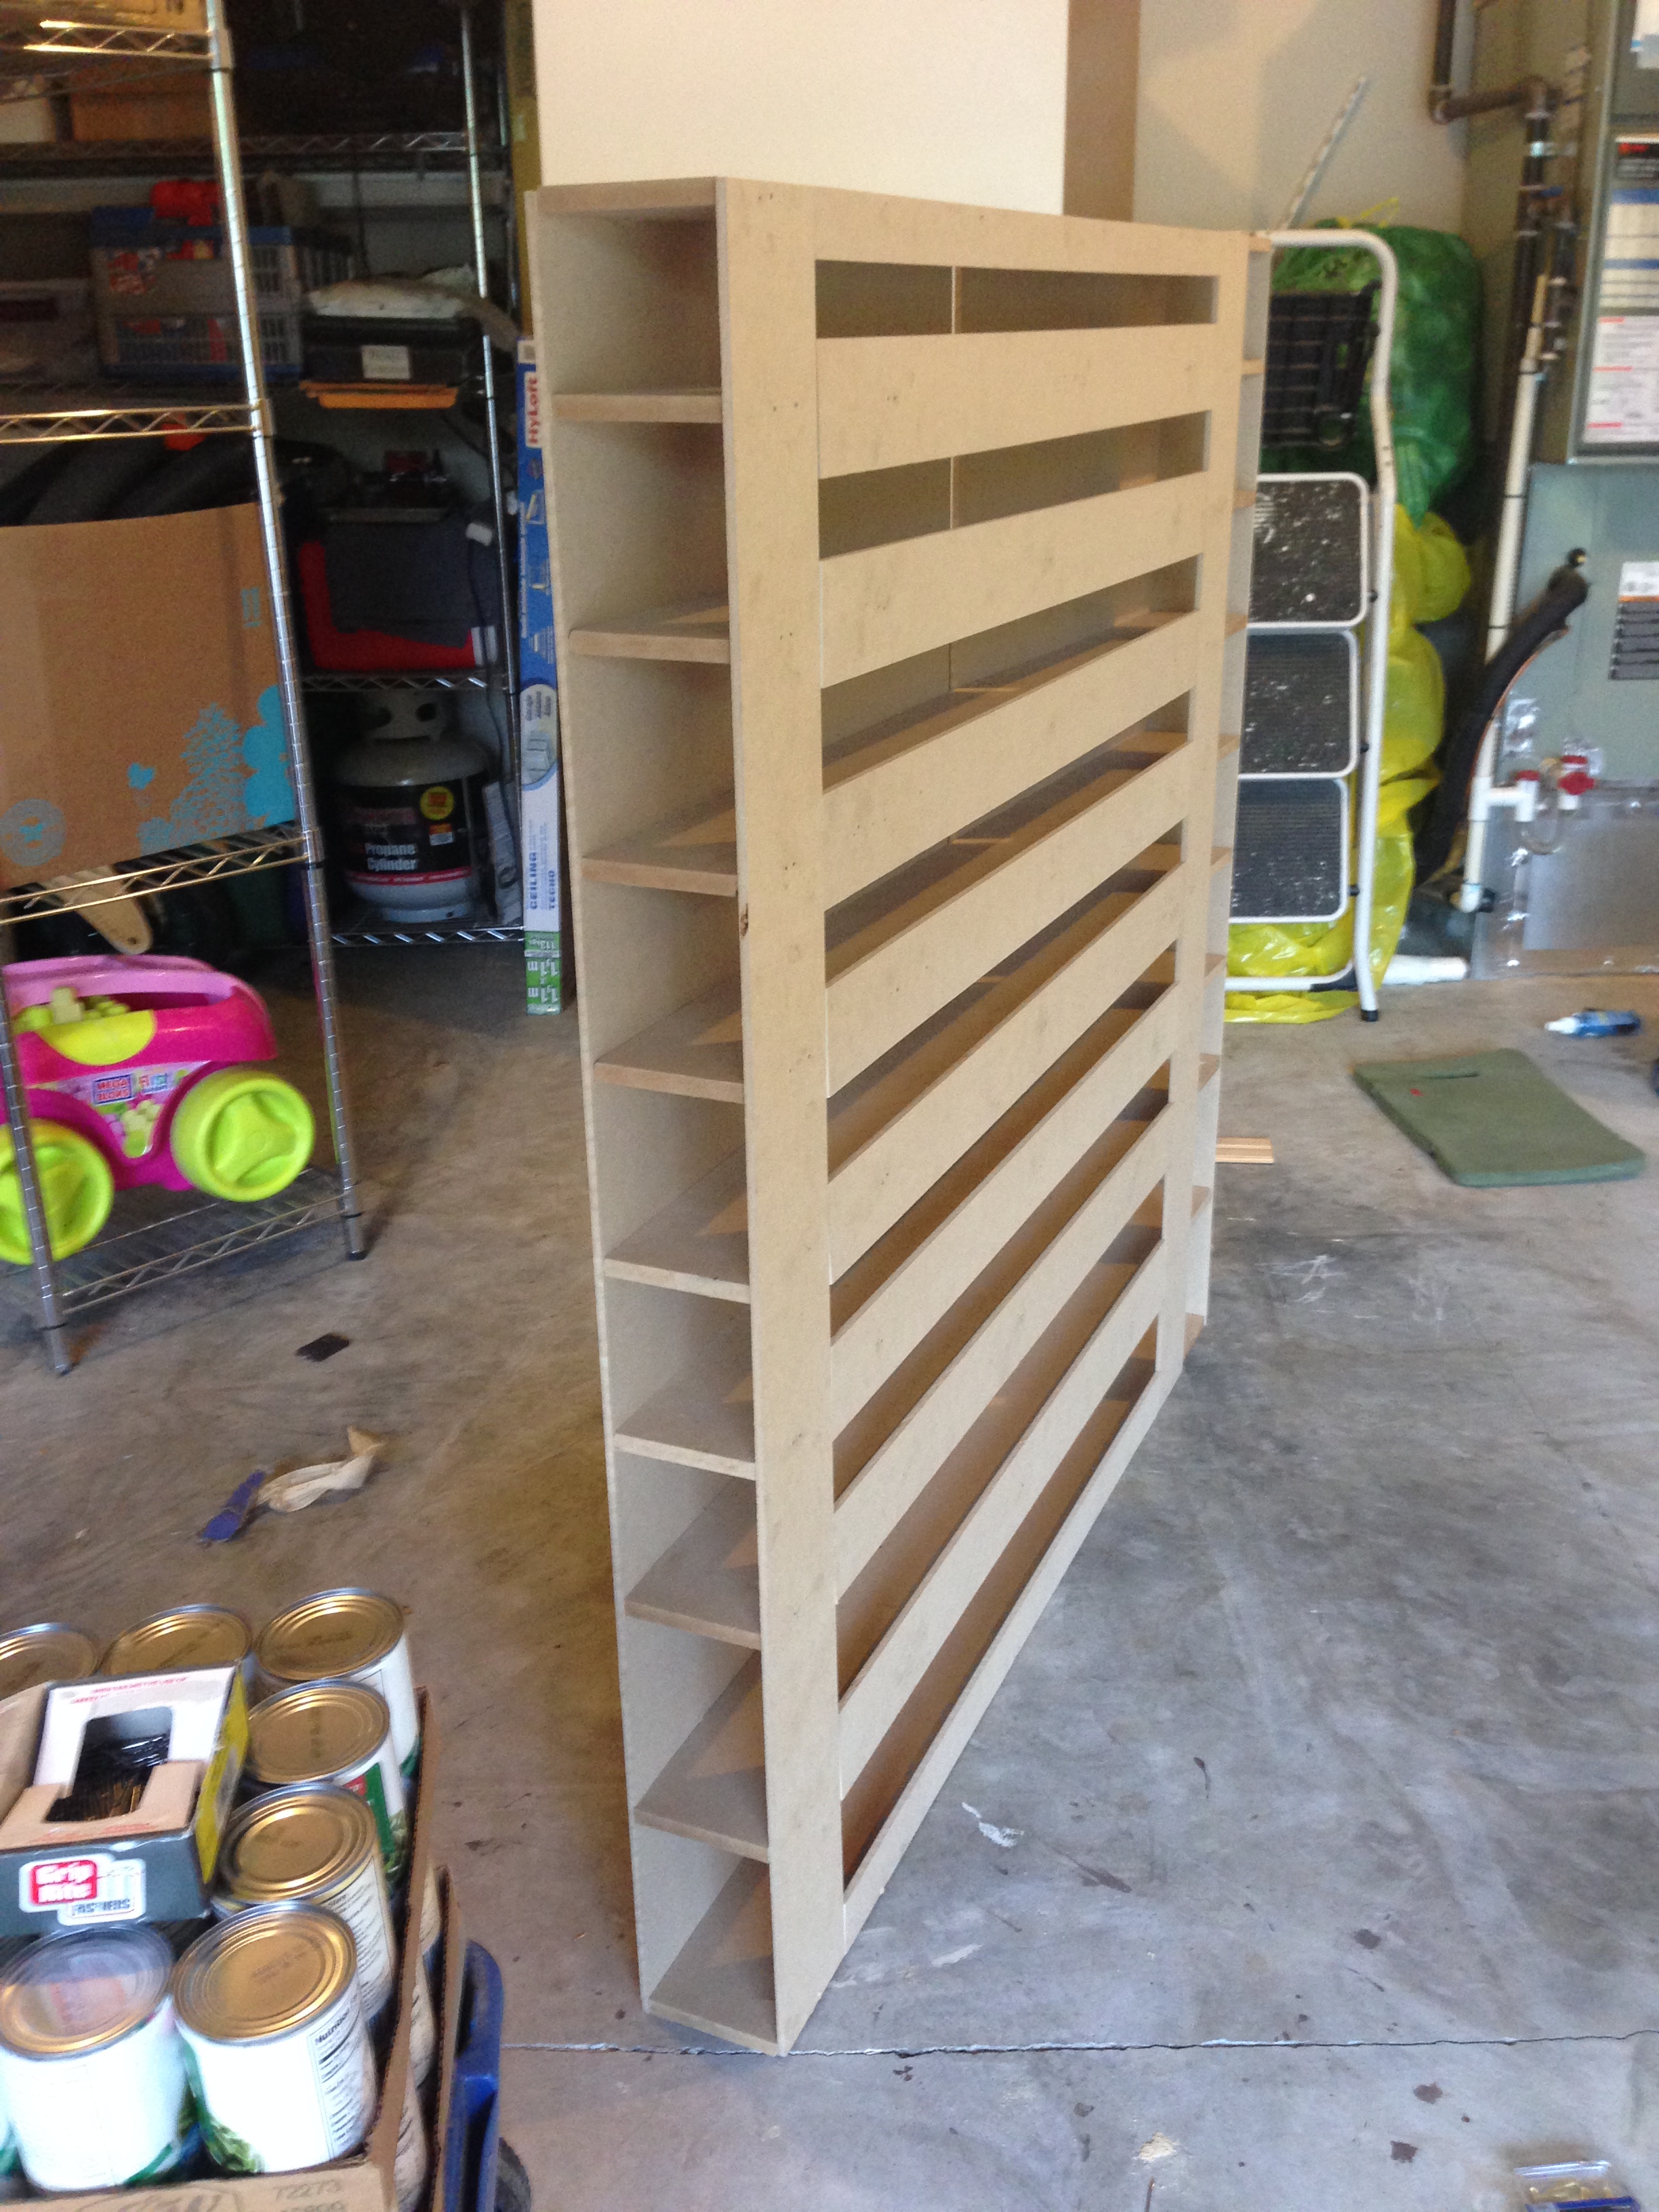
- Carefully flip the unit over – it is not sturdy because it’s a bunch of 1/2” wood screwed to a 1/4” backing.
- Determine the ‘load’ side versus the ‘unload’ side. Line up a your 1/4” x 4.25” x 4 feet shelf side, and screw it into each shelf on the side you want to unload cans from.
- On the load side of the shelf, line up one of the 1/4” x 4” x 4 feet braces on the front face of the shelves, and use dressing nails to attach the brace to each shelf. Now you have created an opening on one end of your shelf to load cans through.
- Back on the unload side, measure the width of your opening (or just use the largest can you plan to store as a template, making sure to include a few mm of clearance) ensure the brace lines up flush with the top and bottom of the unit, then nail the second brace to the front of the unit – through each shelf.
- Line up your 3” x 4 feet shelf guides on top of the 1/2” shelves, running parallel to the shelves. Trim them to fit between the braces, then nail them on.
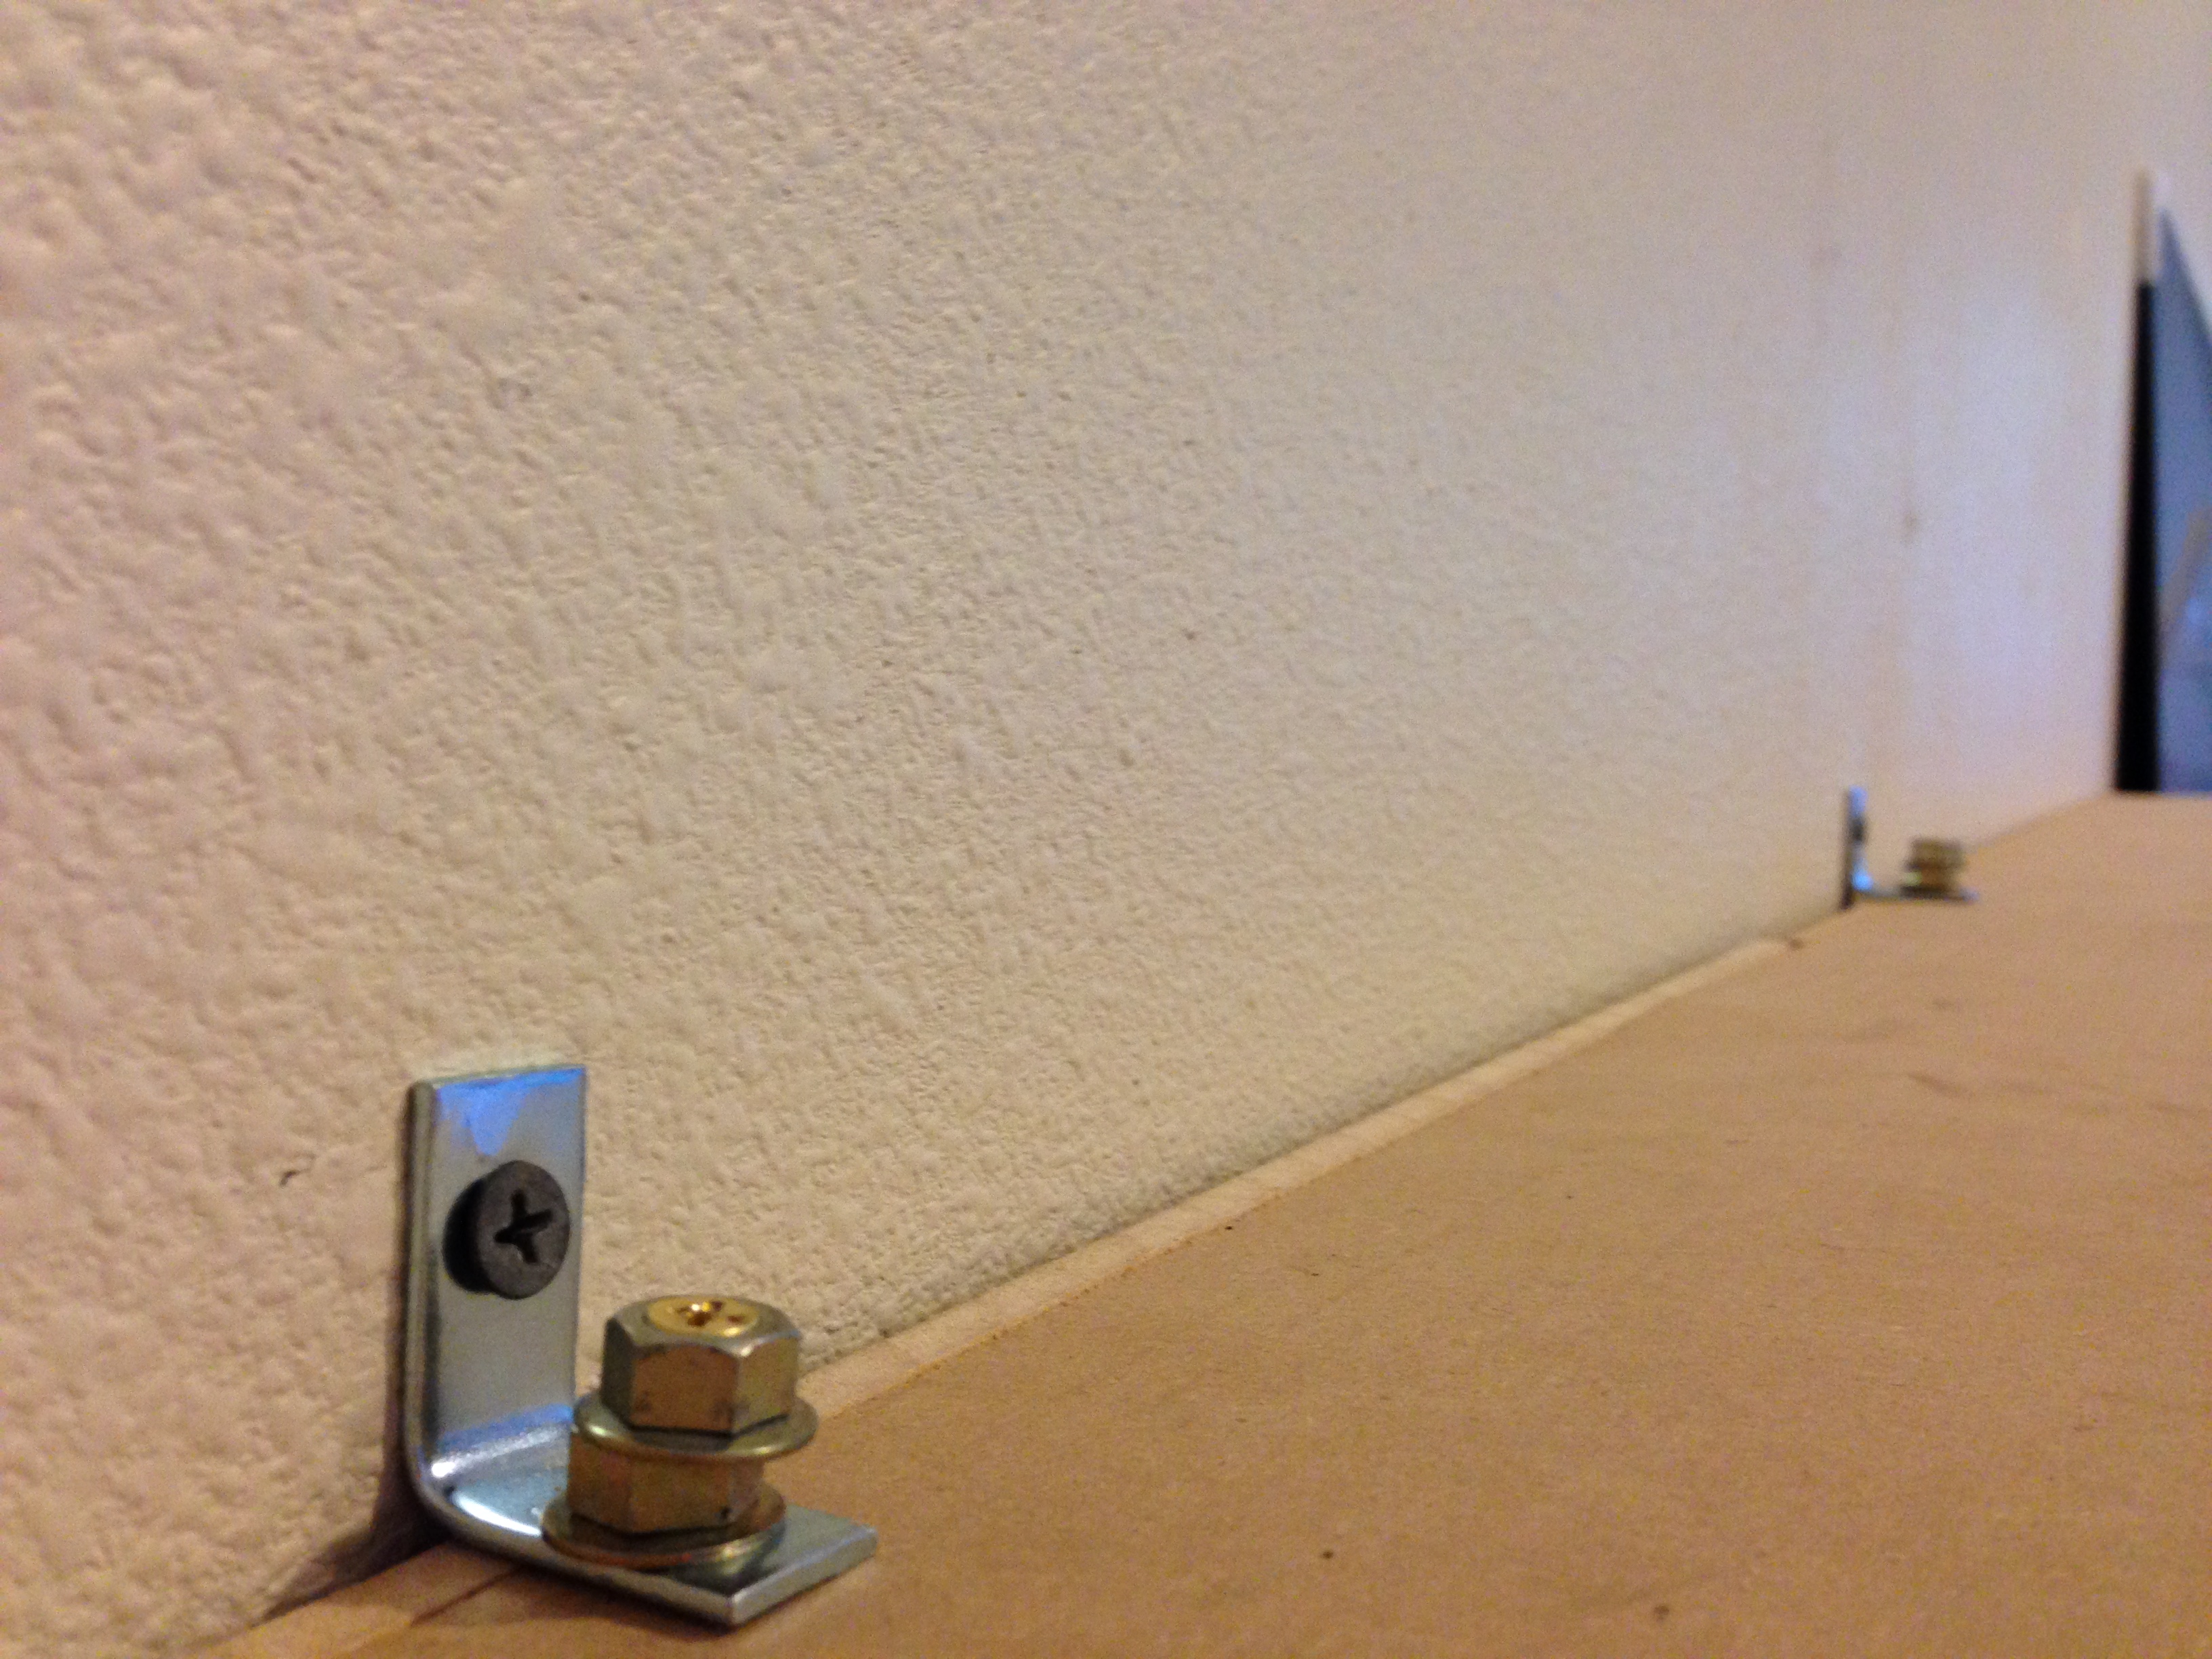
- Install using L brackets to keep this from tipping in an earthquake! (I used drywall screws on the wall, but my 1” wood screw would have gone all the way through the top shelf, so I used a couple of lock nuts hanging around my toolbox as really thick washers.)

- Voila! Finished shelf. You are ready to load cans!
Capacity:
I built with the idea that the largest and heaviest cans would go on the bottom. These plans will build the pictured shelf which was designed to hold the following:
- 1 Row for small cans like tuna fish, tomato sauce, or tomato paste.
- 6 Rows sized to hold anything from Campbell’s soup to 26 oz cans of Pineapple
- 2 Rows of Family Sized Nalley Beef Stew
Adapt this to fit whatever you plan to store!
Lessons Learned
- I am not a carpenter. I cannot pick a project out of the blue and expect perfection – especially when I forgot to check that edges were flush before I started driving. Or that I didn’t check to make sure I was drilling into the center of the shelf. Or that I was drilling into any part of a shelf.
- I spent a lot of time trying to draw out and math out the shelf height with can height, clearance, and shelf opening, but it got mind boggling really fast. I switched to using a can as a template and that made the process go much quicker.
- The store label says 2′ x 4′ but in reality it was 24.5” by 49”. I forgot to check the board size and trim them down before I started, and my finished product didn’t fit in the original spot I’d planned for. See first lesson learned ;o).
- MDF is tough to drill into – I drilled pilot holes for a lot, and even broke a drill bit off i the middle of the project, plus my Milwaukie drill wouldn’t counter sink the screw into the MDF most of the time, leaving screw heads sticking out the back a little. If it weren’t for the cost, I think I’d prefer plywood if I were to do this again.
- 1/4” shelf backing felt flimsy to work with, and I had to be gentle with it, but once the shelf was made, it felt sturdy enough, and I was glad to save the space.
- I parked it a little close to the corner and have to struggle a bit to get larger cans into the lower shelves. I can resolve this by movie the shelf to the right (is on my someday to do list) – just think of access (again) before you drive in those wall anchors.
- No matter how ugly it looks in person, my iPhone camera didn’t pick up any of the imperfections. it looks pretty good from ten feet back! And even more important: it holds my cans just great, so overall, this project was a success!
Here is our canned food storage unit tucked on the inside wall of our garage – hopefully this will help limit the cold/hot fluctuations more than having on the outside wall. We’ve already moved back the junk that occupied this space, and I’m loving this low profile addition!
And here it is ‘live’ with all of the stuff we previously had leaned against this wall, leaning right against it. It’s a design that works! Woot!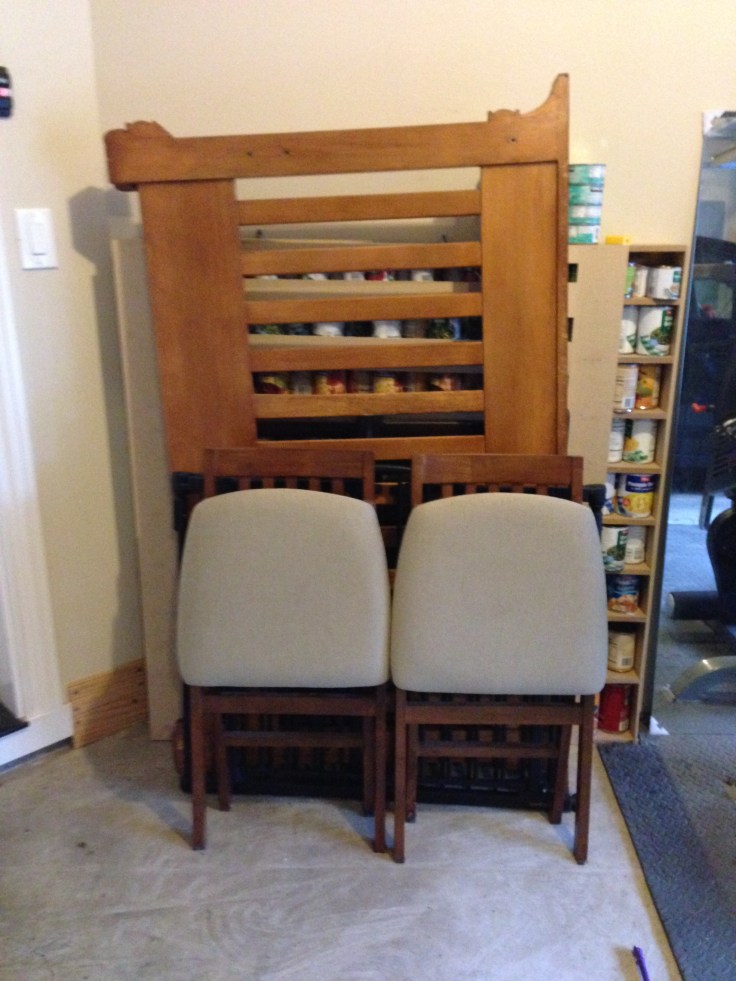
I had fun putting this project together, and it cleared out a bunch of shelf space for our other (bulkier) food and water storage! One more bite taken out of emergency prep – woot!

Leave a comment